You already know that a one second delay in website speed decreases conversions by 7%?
But what does that actually mean?
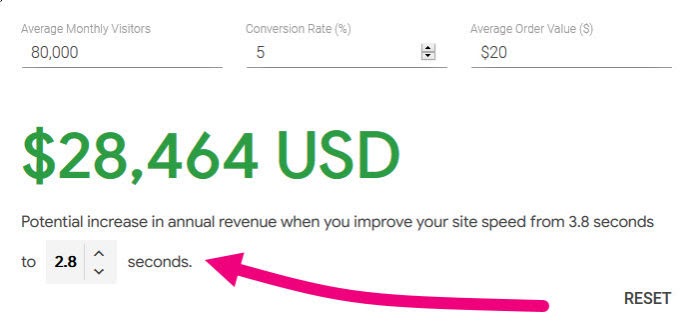
According to Google, if I increased my website speed by 1x second…
…I would make an extra $28,464 per year!
But why does that happen?
Because:
- Google has CONFIRMED it’s ranking factor
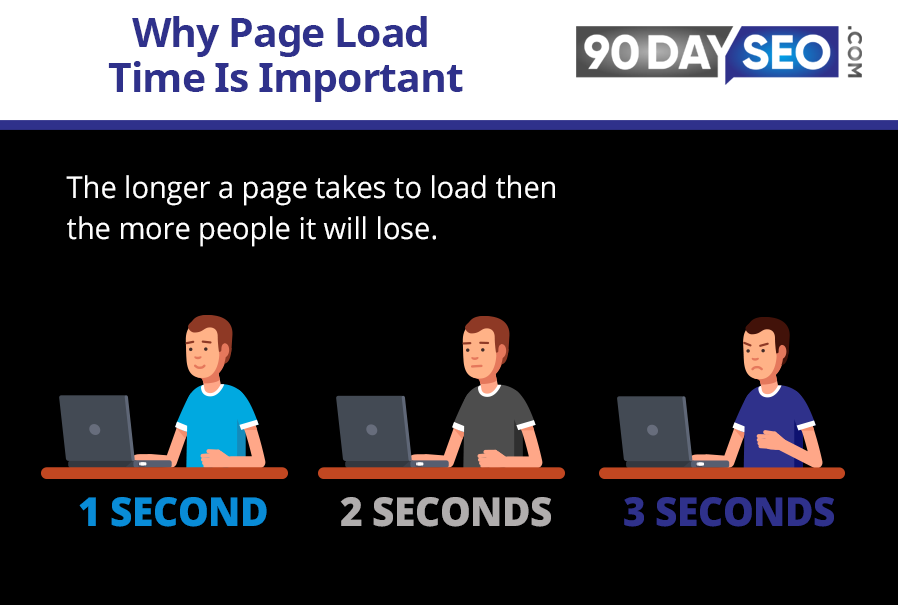
- 40% of users will abandon a website that takes longer than 2x seconds to load
- 79% of people said they wouldn’t return to a site with poor performance
Simply put:
Site speed is critical for rankings and conversions.
Today, we’re going to audit your site to ensure you’re optimised for both.
Review Last Week’s Results
First open up your On Page SEO Spot Check sheet and review last week’s results:

Where your numbers are right now isn’t too important. This is a baseline to work from.
We’ll compare your site to these speeds after today’s module.
How To Improve Site Speed (My Ultimate Tool Combination)
Seeing my site could be $28,000+ more profitable was a huge wake up call.
So I spent a lot of time testing all possible combinations of:
- Plugins
- Configurations
To bring it back up to speed. The resulted in what I consider to the ultimate SPEED setup, which in reality is just two premium plugins/services.
But I realise you might not have the budget for premium plugins, so I’m going to layout-
- The PREMIUM SPEED setup (which we use across all of our sites and so should you)
- The FREE SPEED setup
Let’s look at both.
The PREMIUM SPEED Setup
Tool 1: WPRocket
The first tool you need is WPRocket. It is by far, the ultimate WordPress caching plugin.
Basically, it helps you site to load faster in a few clicks while appyling some awesome optimisations you can’t get anywhere else.
Download and install WPRocket. Then access the dashboard:
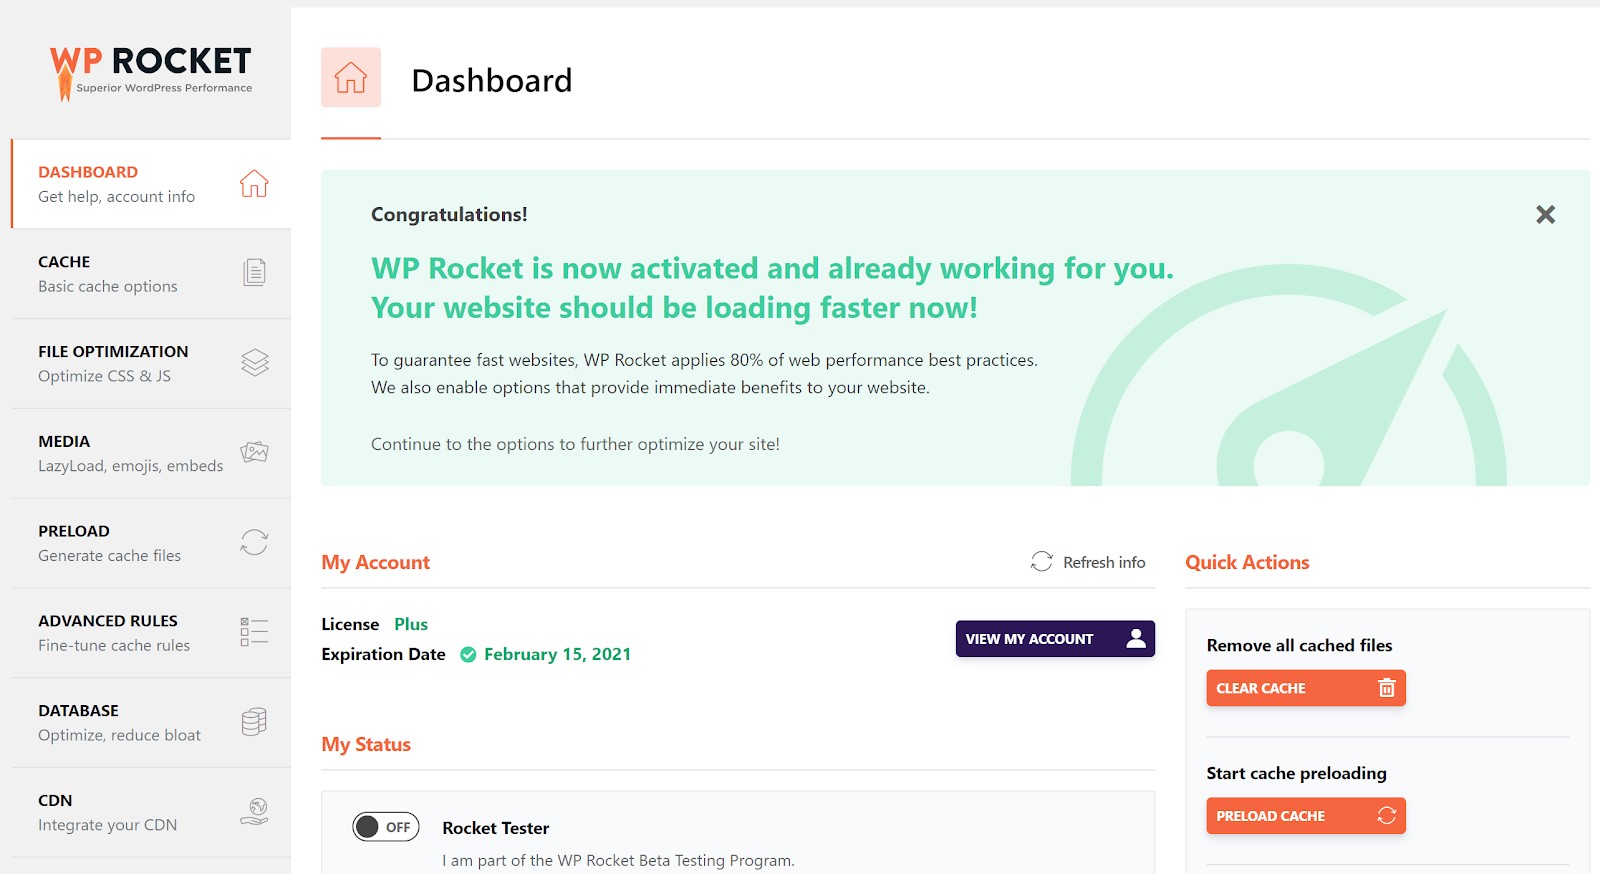
The first part of the tool you need to configure is CACHE.
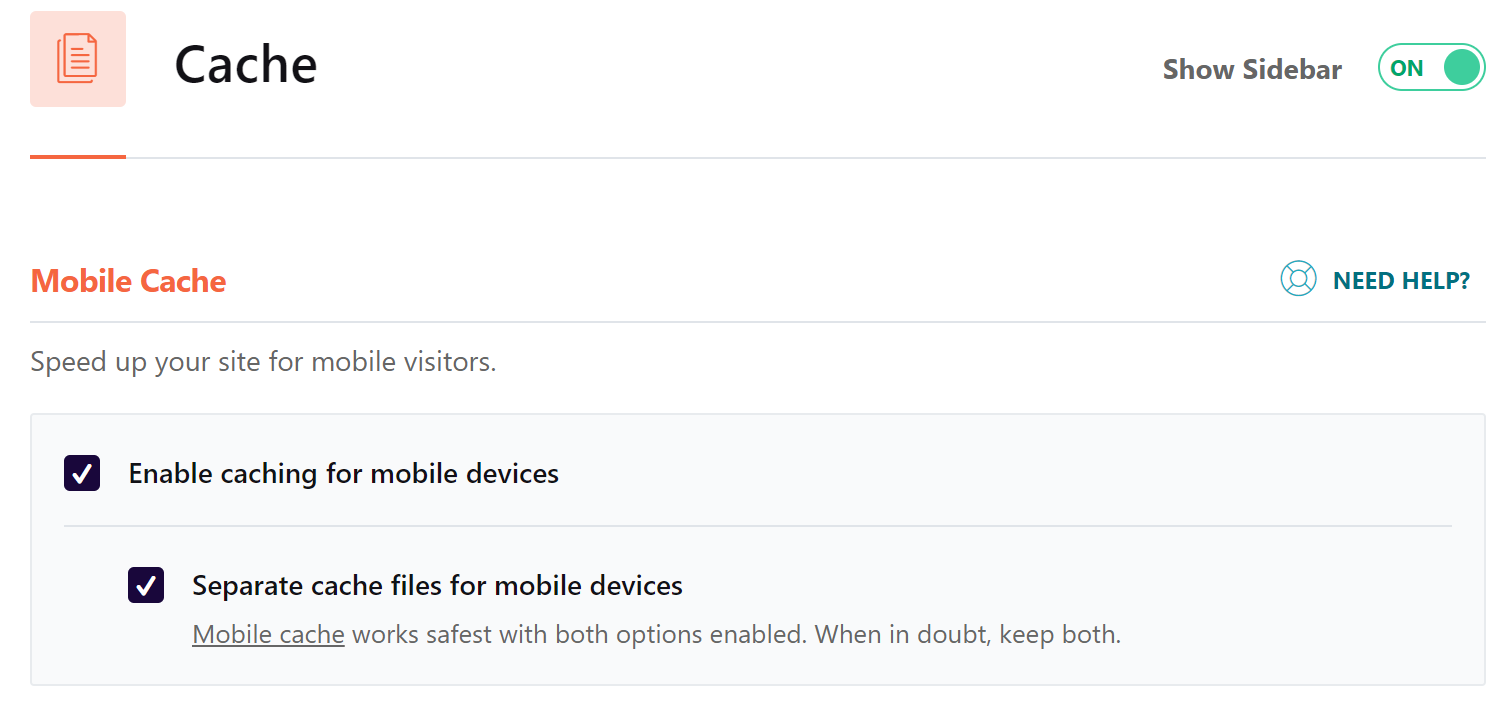
Here you should enable both mobile cache and the separate cache for mobile devices:
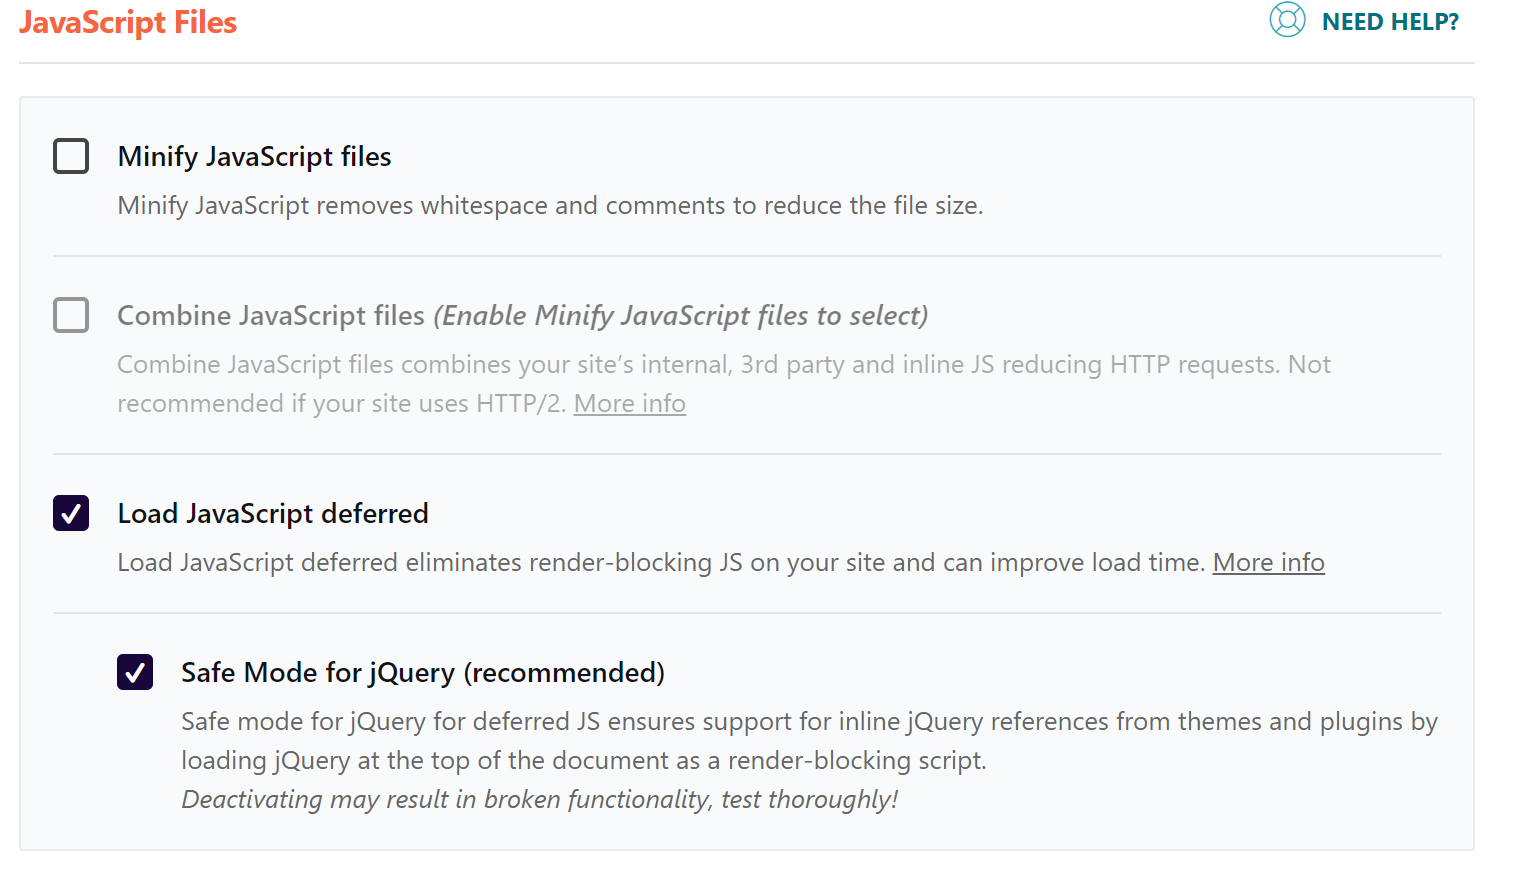
Then move to FILE OPTIMIZATION. Enable ALL of the basic settings.

The scroll down and select the Optimize CSS Delivery box.

Then scroll down and select the Load JavaScript Deferred option with Safe Mode on.
Then click over the MEDIA.
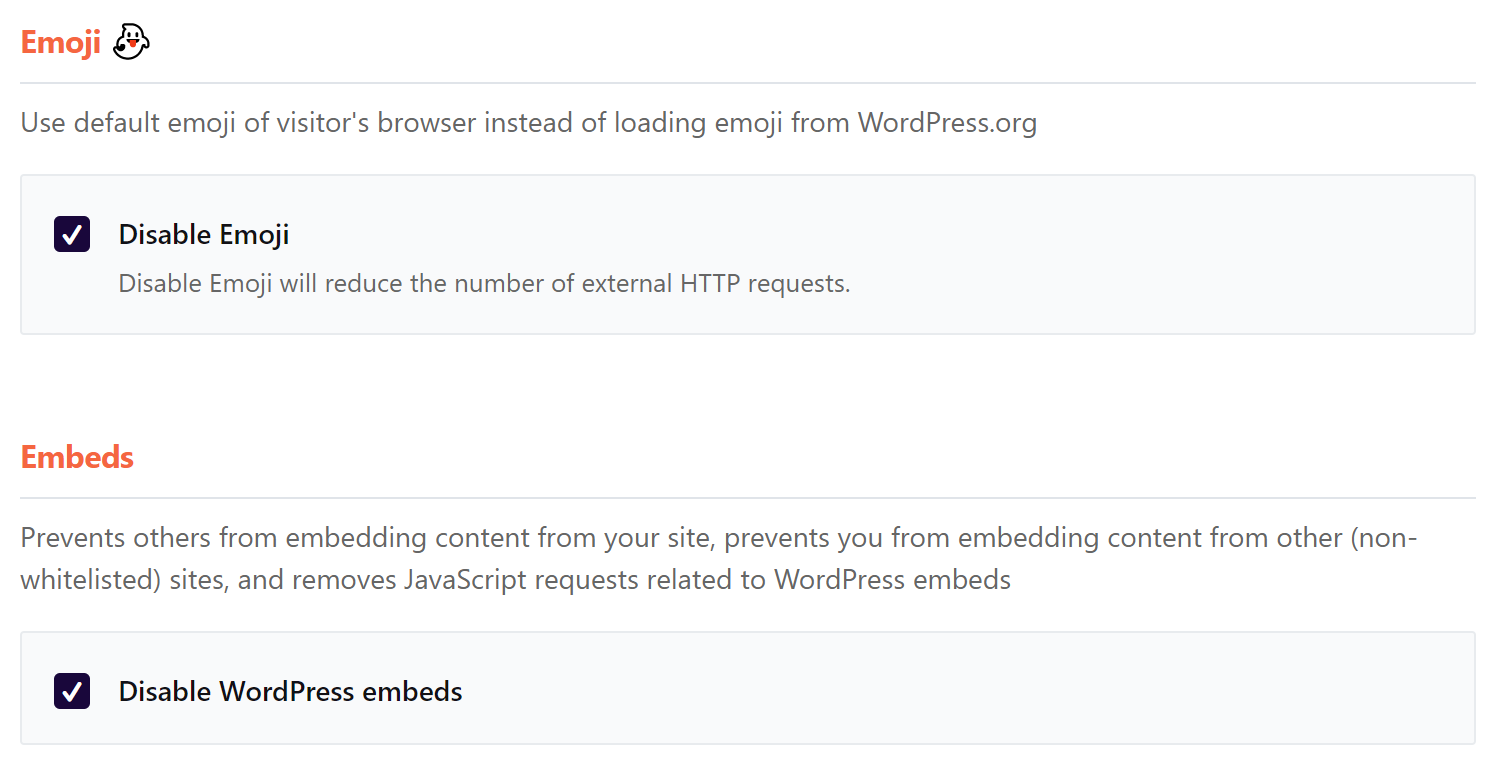
Here you need to enable ALL of the LazyLoad options.

Also select the options to disable both Emojis and WordPress Embeds.
Head to PRELOAD. Select Activate Preloading.

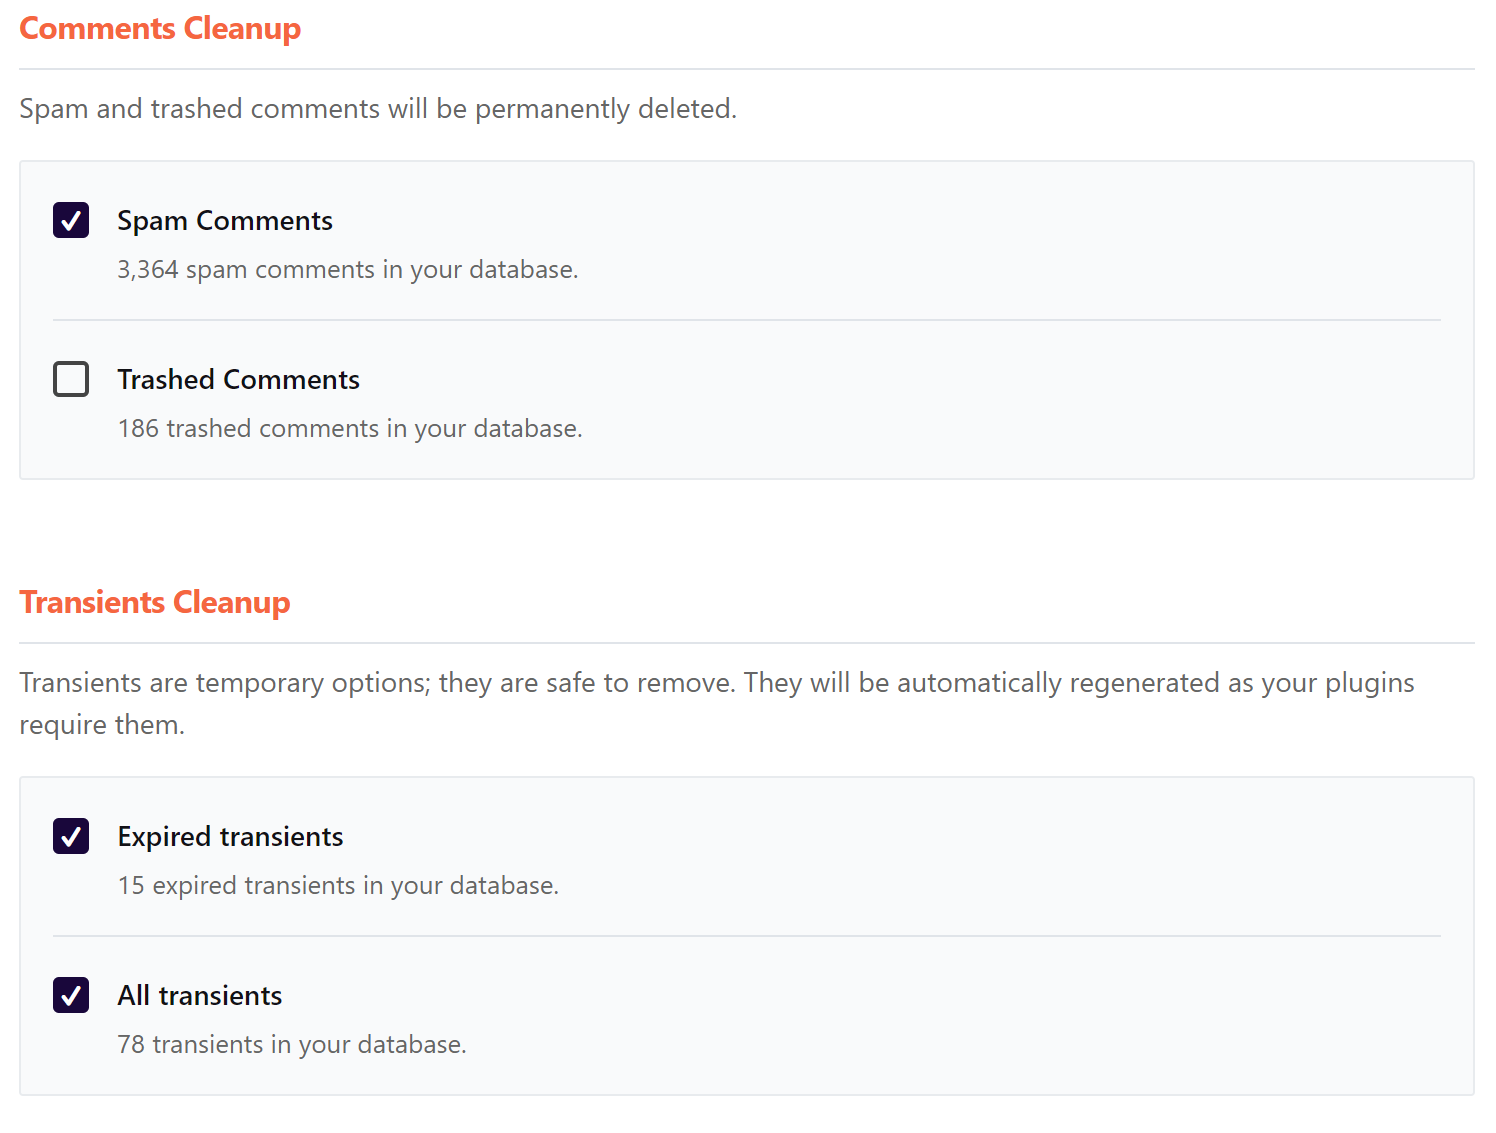
Head to DATABASE.
Here you will select the Spam Comments Cleanup and ALL Transient Cleanup options.
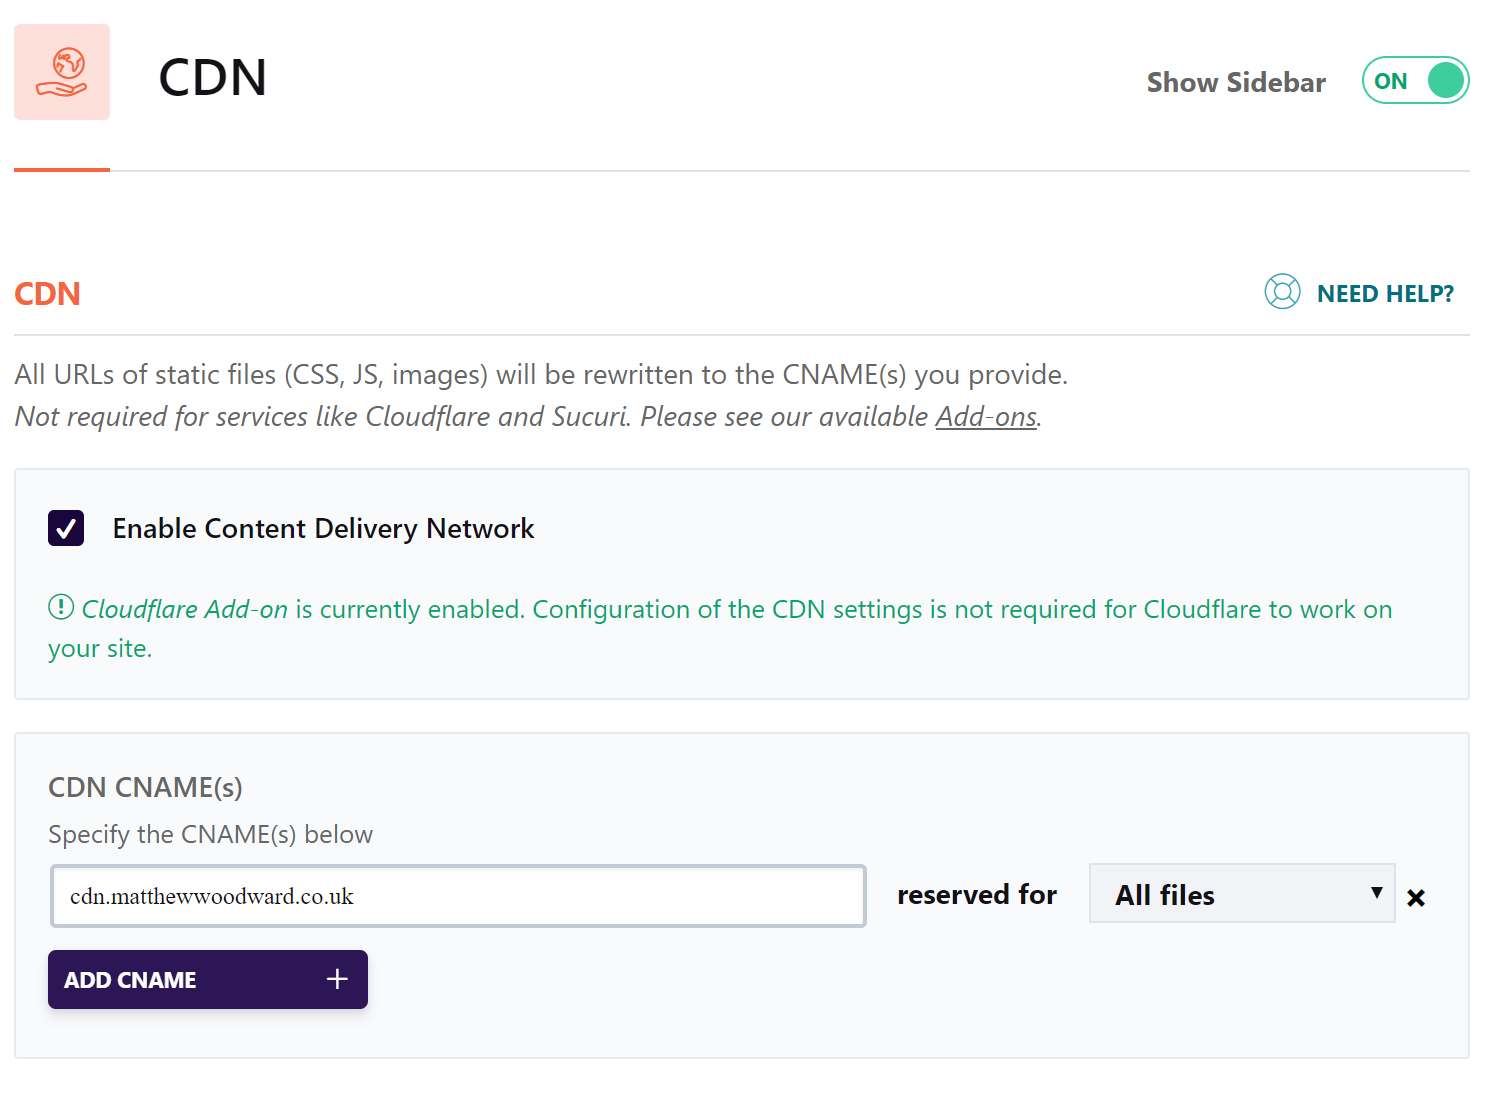
Then head to CDN. This is where you will connect your Content Delivery Network.
I use KeyCDN – just follow this guide to get setup.
Finally head over to ADD-ONS. You need to enable Google Tracking and Facebook Pixel.

Here’s a recap of these settings for you to double check:
- Cache:
- Enable – Mobile cache
- Enable – Separate cache for mobile devices
- File Optimization:
- Enable – ALL basic settings
- Enable – Optimize CSS delivery
- Enable – Load JavaScript Deferred (with Safe Mode on)
- Media:
- Enable – ALL LazyLoad options
- Disable – Emoji
- Disable – WordPress Embeds
- Preload:
- Enable – Activate preloading
- Database:
- Enable – Spam Comments Cleanup
- Enable – ALL transient cleanups
- CDN
- Enable – Content Delivery Network (I use KeyCDN)
- Add Ons:
- Enable – Facebook Pixel Optimization
- Enable – Google Analytics Optimization
Tool 2: Shortpixel
Shortpixel is an image compression tool. They offer what’s called Lossy & Lossless Compression.
They also automatically generate the new .webp image filetype which reduces image sizes even further.
What I love about Shortpixel is how they shave upto 80% of file sizes, but maintain image quality. Take a look:
![]()
This means you can have SPEED without making your site look low-budget.
Their tool has saved me 46x Terabytes of data.
![]()
This translates to A LOT of speed. Especially with my monthly traffic numbers.
Install ShortPixel and enter the dashboard.
In the GENERAL tab activate the Lossless Compression option:

Then go the Advanced Tab and scroll down to select the Create WebP images option:

Next:
Go to Media > Bulk Shortpixel in WordPress and run the bulk optimization tool to compress all your images-
![]()
Once done:
Head back to WPRocket > Media and enable this option-

At this point we have already made significant improvements to your site speed.
But there is one more thing that you can do to really double down on speed…
Tool 3: CloudFlare Pro
CloudFlare are an online performance and security company bit we’re going to focus on their performance features.
Sign up. Connect your site. Open the dashboard. Then the SPEED tab.
Activate ALL these settings so they look like this:
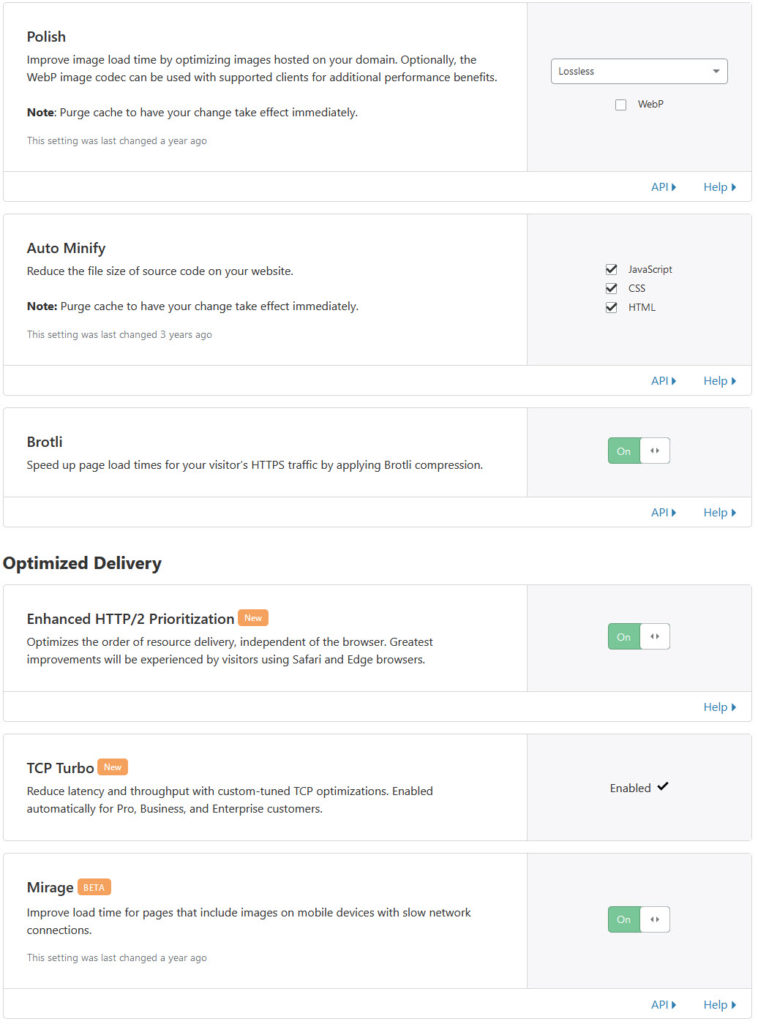
You can also activate the Rocket Loader but if you find something not working on your site, come back here and disable it – sometimes it works, sometimes it doesn’t!
Now head to the NETWORK tab. Here you’ll activate these options-
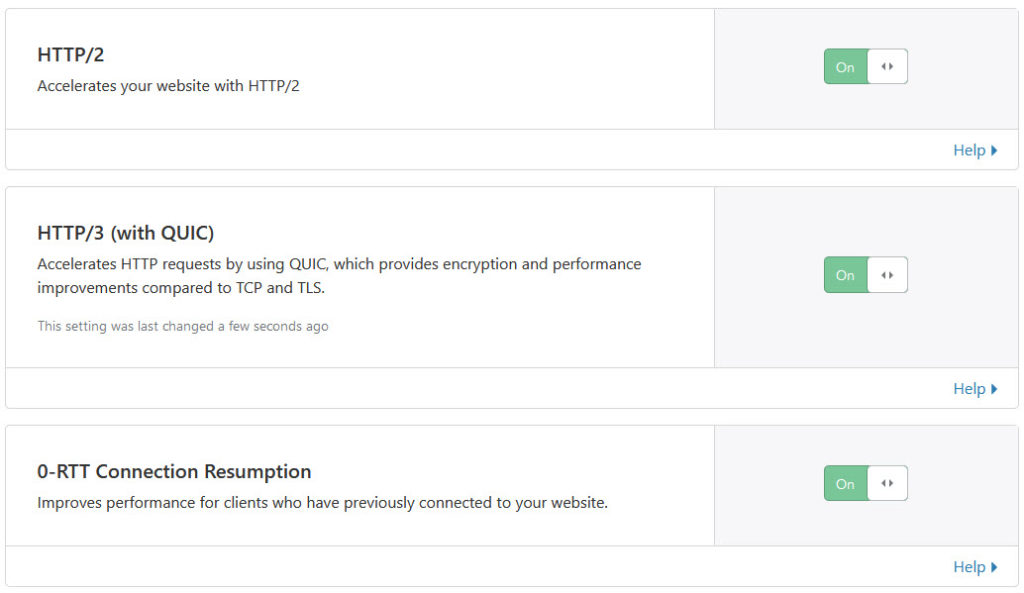
Then go to the TRAFFIC tab and activate Argo.
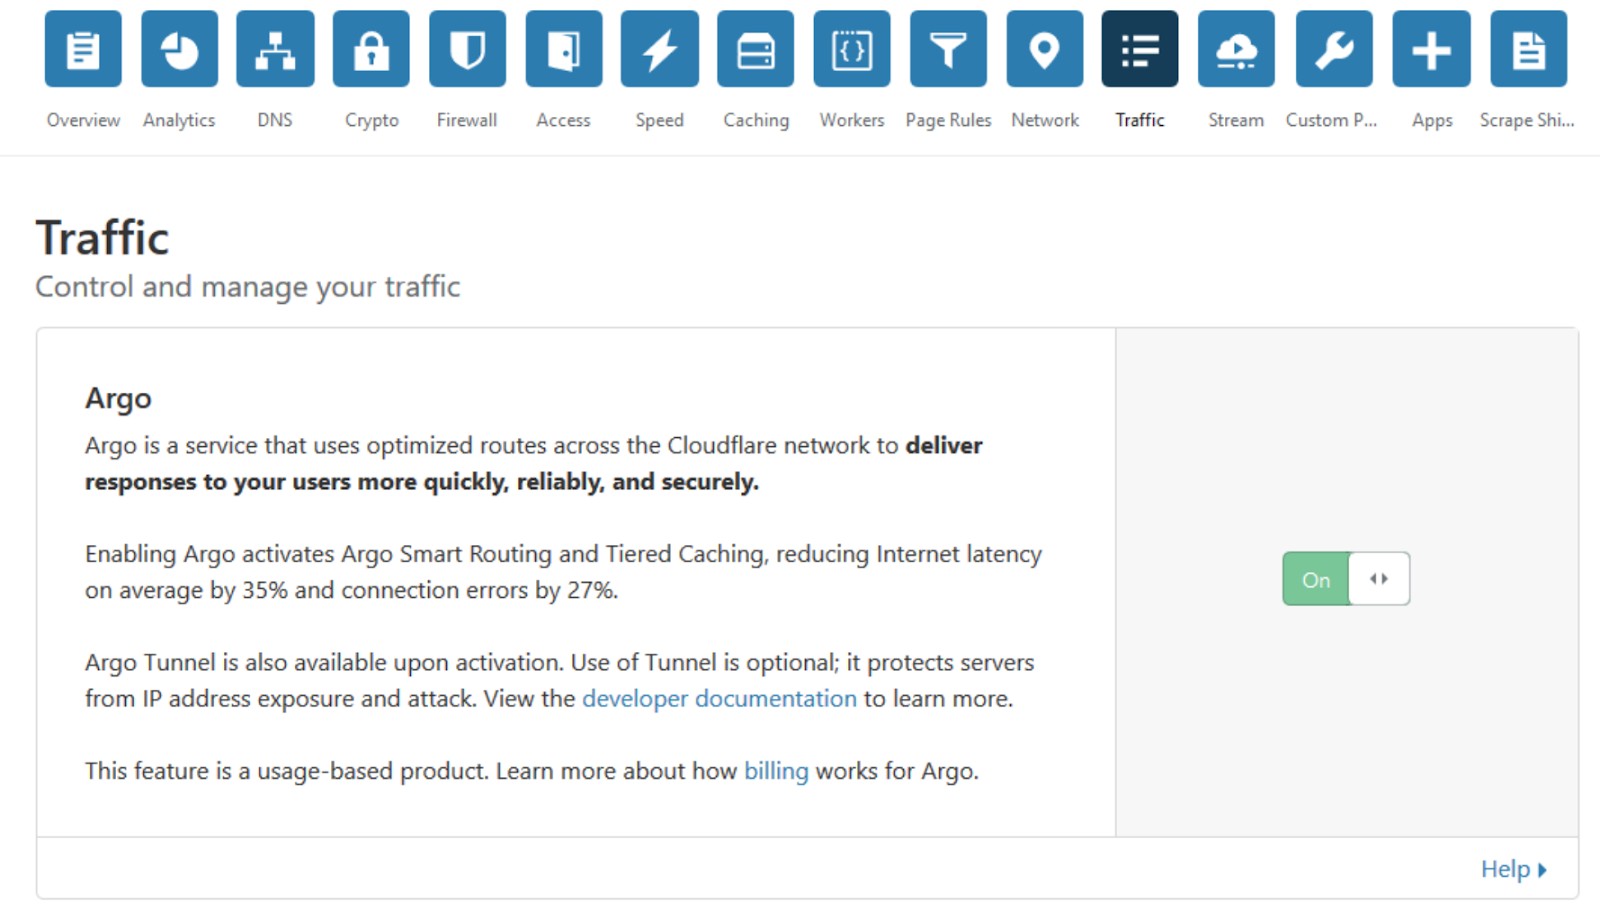
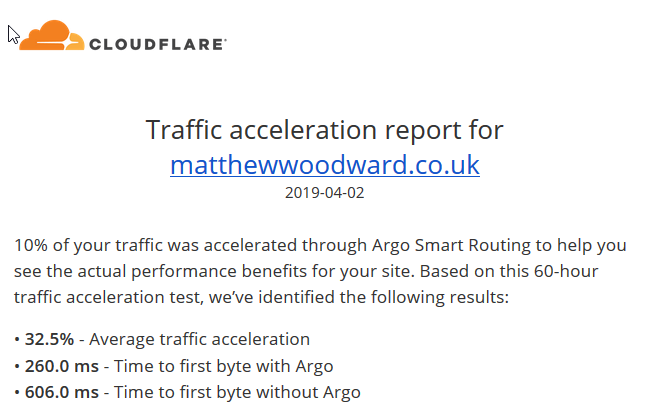
Argo will have an instant impact on your speed.
Just activating the tool increased my site’s speed by 32.5%.
Tool 4: KeyCDN
Content Delivery Networks can dramatically speed up your site.
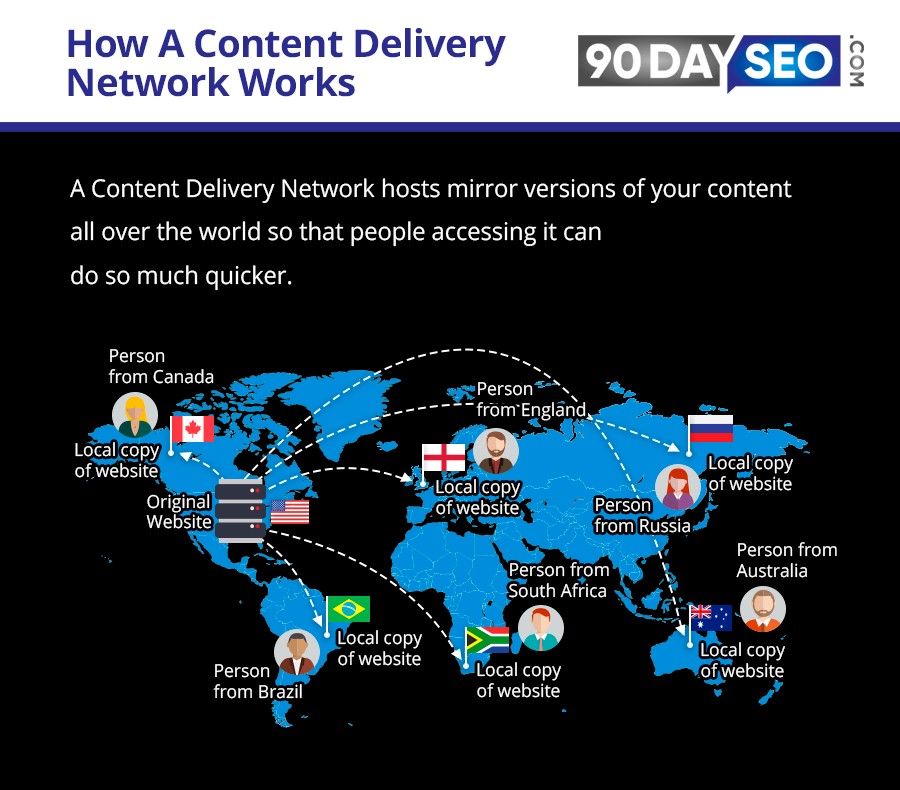
You need to be using one and I use KeyCDN.
And I know what your thinking, isn’t CloudFlare a CDN? And I agree. But in all my testing, adding KeyCDN to CloudFlare increased my site’s performance by another 20%.
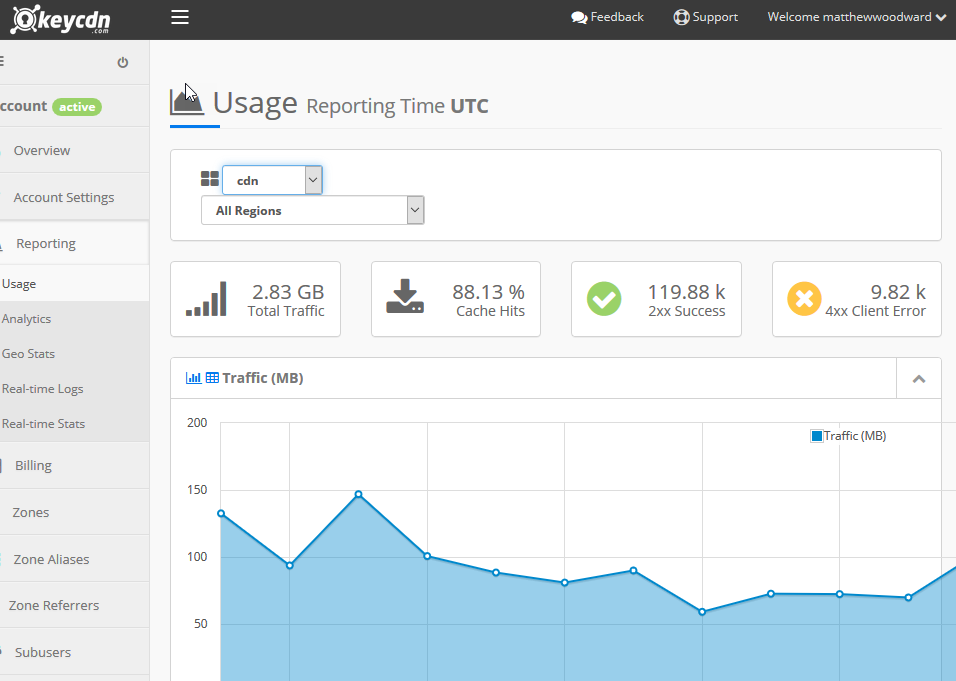
That is the kind of difference both users and search engines will notice and it costs next to nothing.
The Best FREE SPEED Setup
Paid tools often give you the best results. But can still speed up your site for free.
But to be absolutely clear at a BARE MINIMUM every site I build launches with WP Rocket, Shortpixel and CloudFlare Free – that is from launch day zero.
Once the sites start gaining traction, then we deploy Key CDN and Cloudflare Pro to double down on speed and grow from there.
But if you are on a super strict (you should still stretch for WP Rocket at least) but here is the best FREE speed configuration I could find…
Free Tool 1: LiteSpeed Cache
LiteSpeed Cache works better if your running a Litespeed server, but it will work if your not running on Litespeed as well.
It gives you a handful of the optimization tools from WPRocket. You can activate:
- Caching
- Minify CSS/JavaScript/HTML
- LazyLoad Images (but no WebP)
- Create Lossless Compression (but no WebP)
- Connect with a CDN
Remember this is a LITE version so you are missing out on many features of WPRocket.
Free Tool 2: WP Smush
WP Smush is a well-established image compression tool.
They offer lossless compression and lazy loading.
But…
Using ShortPixel I was able to reduce images already compressed by WP Smush another 30%.
This means your site will still be carrying extra weight that slows it down but it’s better than nothing.
Free Tool 3: Cloudflare Free
Cloudflare free gives you the bare minimum. You get access to their CDN. But no access to Polish, Mirage, or Argo.
Still, it’s better than nothing!
My Results…
After applying all of this, what happened to my site?
Here’s how it looked BEFORE:

My site was full of heavy images and extras. All “pass” but with issues.
Here are the results AFTER:

There are massive improvements all around:
- Average page size reduced by 82% (4274KB vs 798KB)
- Average number of requests reduced by 59% (166 vs 68)
- Average load time reduced by 33% (4.3 seconds vs 2.8)
- Average mobile Google page speed score increased by 88% (32 vs 60)
- Average desktop Google page speed score increased by 15% (84 vs 97)
- All pages are “pass” without issues
If you apply the steps in this post to your site, I guarantee you will see big changes too.
If not, it’s time for the last resort…
Last Resort! Migrate Host
Some hosts like:
- Bluehost
- Host Gator
- Just Host
- GoDaddy
Overload their servers. These make all of the connected sites slow.
Then there are hosts like WP Engine which you assume to be fast but based on my and others testing, are actually pretty slow and get out performed by much cheaper hosts.
In this case it might be time to migrate hosts. Check out my hosting case study and video to learn more
Although migrating hosts is a last resort, it’s pretty quick and straightforward to do using a plugin like Duplicator if your new host doesn’t do the migration for you.
Final Thoughts…
Once you have integrated the steps in this lesson, you will have just made a HUGE AND IMMEDIATE impact on your site.
You will see conversion rates and engagement metrics increase instantly.
Many SEOs ignore site speed. And they pay the price in the long run!
But you’re smarter than that!
In the next lesson, we are going to tackle the rest of your technical SEO problems…